cPanel and WHM consist of the main shared IP address used to create new shared hosting accounts on the server.
This helps web hosting providers to develop new accounts quickly and automate the process instead of a time-consuming domain and web server configuration process. If you want to change the main shared IP address on your cPanel server then check this article and follow these easy steps:
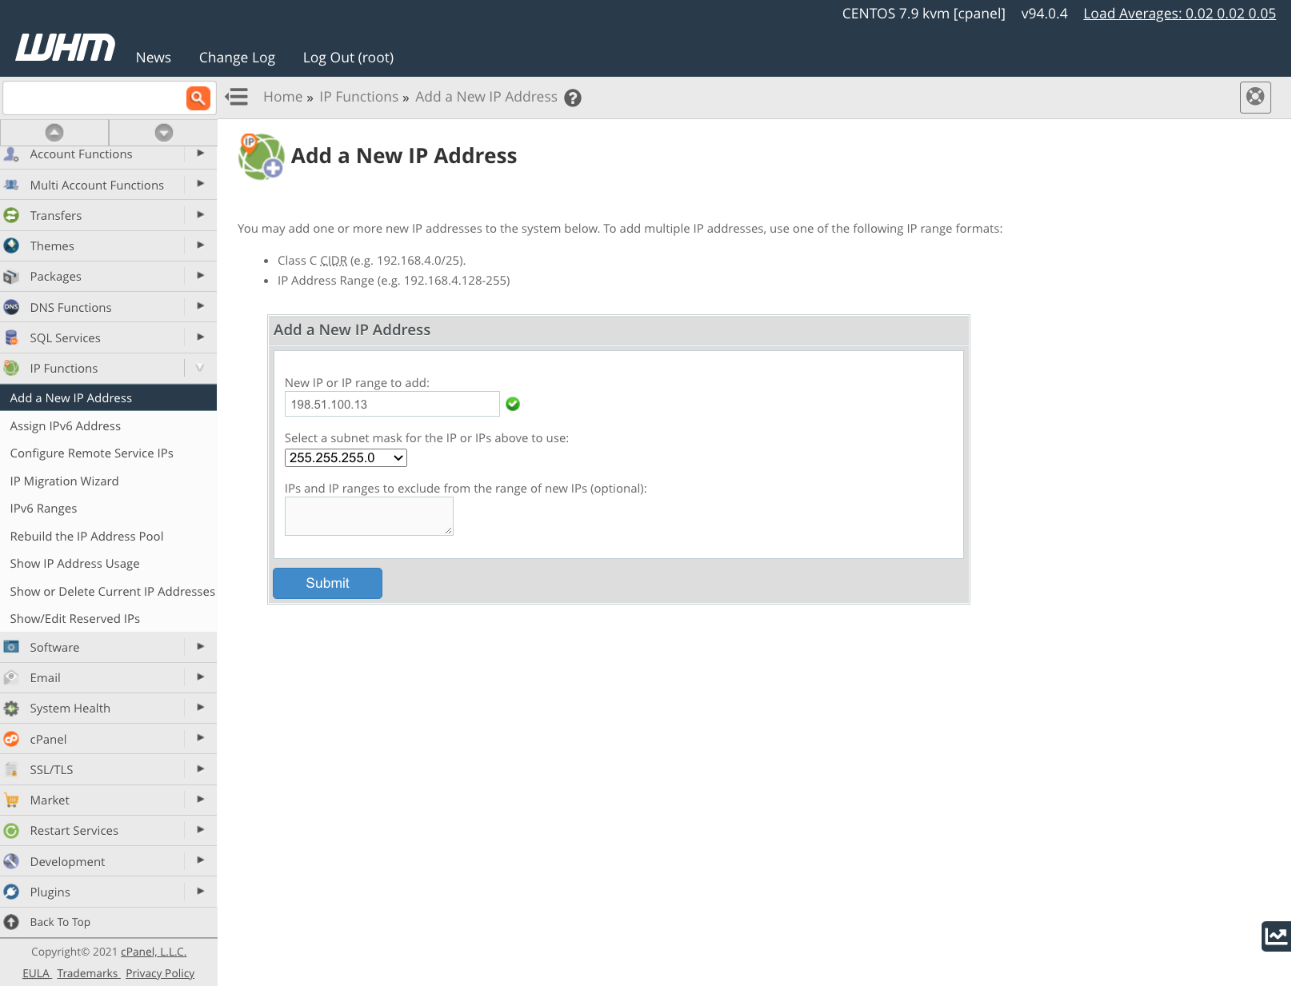
How to Add a New IP Address to Your Server
First, you’ve to arrange the new IP address with your hosting provider. They will share the IP from the available address space and configure their network to connect it to the server. Additionally, you need a network’s subnet mask.
Subnet masks rely on the network’s configuration. For this, you must ask your web hosting provider which one to use.
Once the new IP address is ready, the next is to configure the server to use it in WHM’s >> Go to Add a New IP address tool >> IP Functions in the WHM’s sidebar menu.
How to Change Main Shared IP Address
Now, the new IP address is available within cPanel and WHM. Next is the change of the main shared IP address.
The new address will be used while creating the cPanel accounts in the future. However, changing the IP address doesn’t migrate existing shared hosting accounts.
Under WHM’s Basic WebHost Manager Setup tool, you can change the shared hosting IP address.
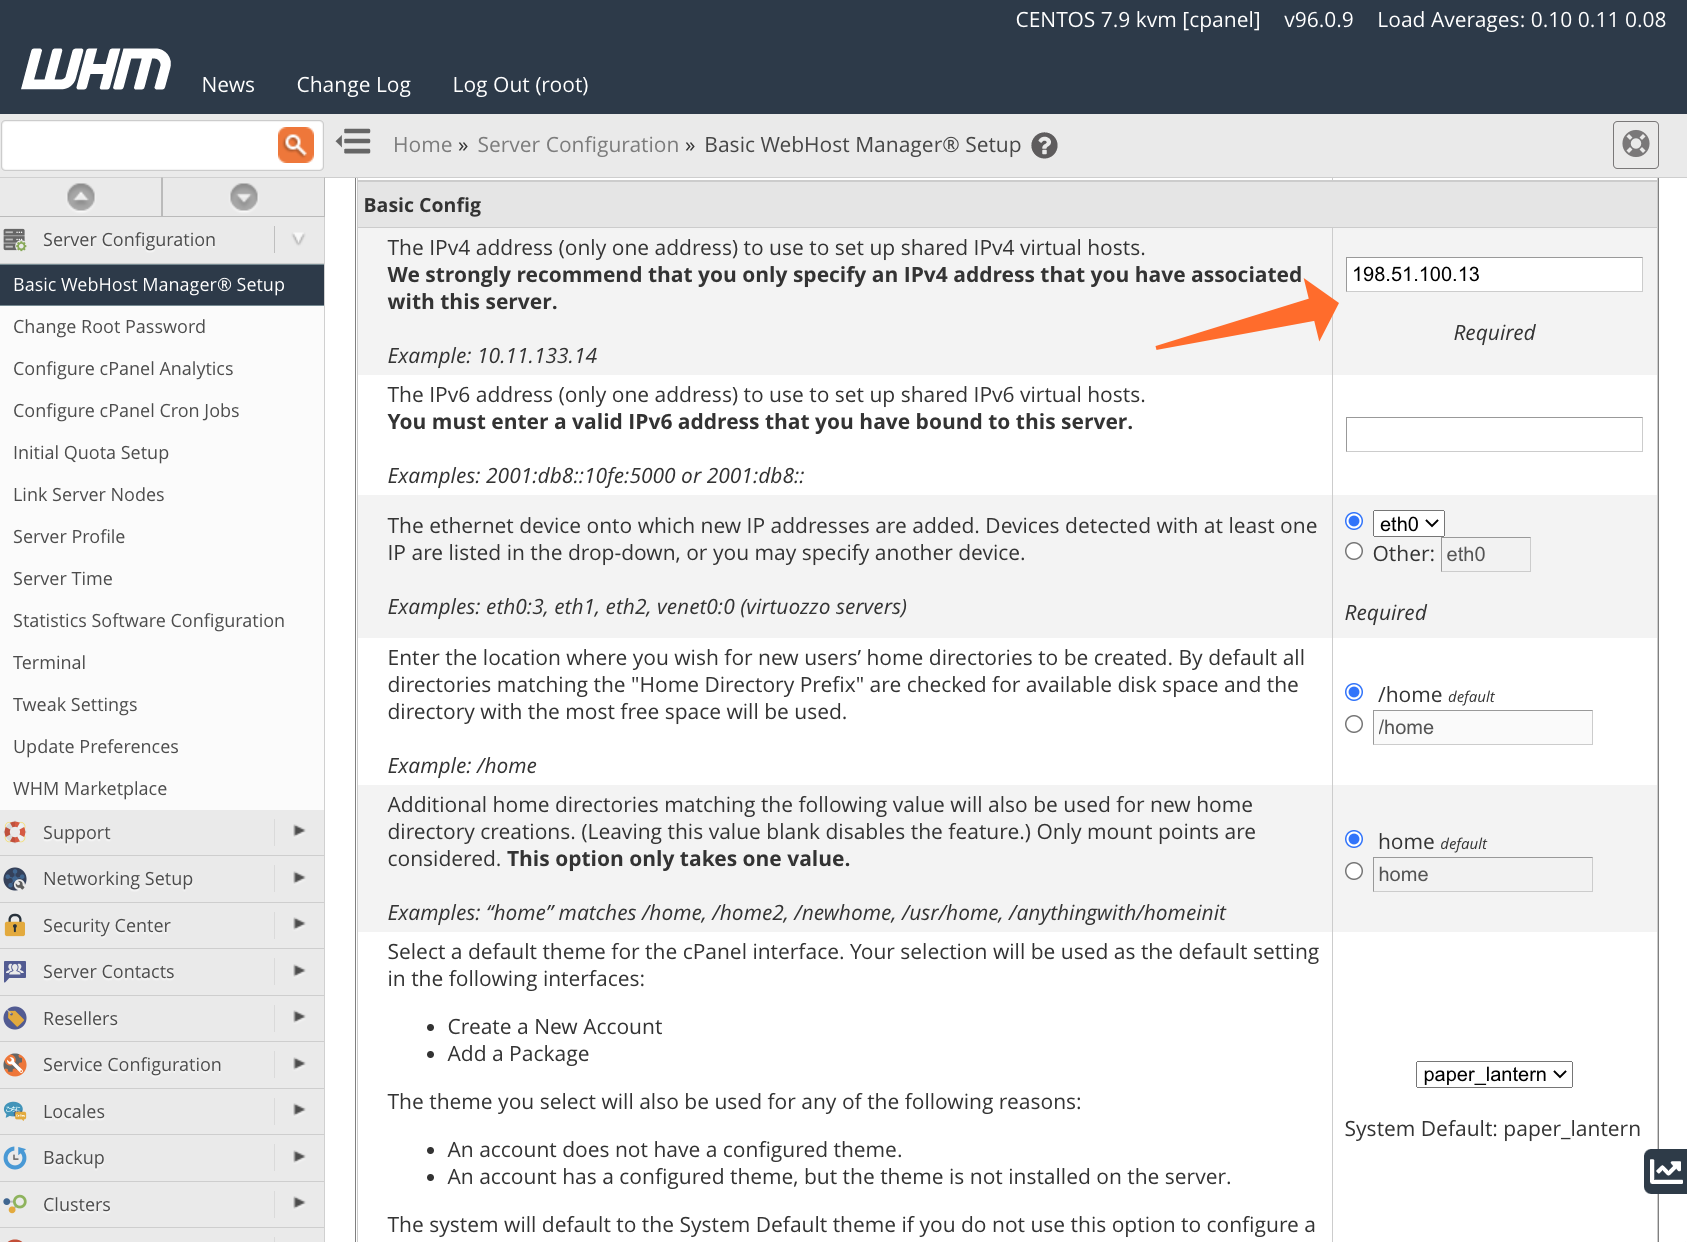
In Basic WebHost Manager Setup, scroll to the Basic Config section. The first entry configures the IP address used while creating the new virtual hosts for shared hosting accounts. Enter the new address and scroll to the bottom of the page and click on save.
Avoid entering an IP address that you’ve not already added to cPanel with the steps mentioned above.