
Intro
This article is written to guide the installation of Xen on Virtualizor.
What is Xen?
The Xen Project is an open-source virtualization technology that provides a powerful and efficient hypervisor for virtualizing computer systems. It was initially developed at the University of Cambridge and later maintained by the Linux Foundation as part of the Xen Project. The project’s primary goal is to create a high-performance hypervisor that allows multiple operating systems to run on the same physical machine while maintaining strong isolation between them.
Key features of the Xen Project include:
Paravirtualization: Xen originally used a paravirtualization approach, where guest operating systems are modified to work cooperatively with the hypervisor. This approach offers improved performance over traditional full virtualization by reducing the overhead of virtualization.
Hardware-assisted Virtualization: Over time, the Xen Project introduced support for hardware-assisted virtualization using technologies like Intel VT-x and AMD-V. This allows guest operating systems to run without requiring extensive modifications.
Security: The Xen Project places a strong emphasis on security and isolation. The hypervisor is designed to minimize the attack surface and isolate guest operating systems from each other and from the hypervisor itself.
Performance: Xen is known for its performance efficiency, making it suitable for a wide range of applications, including server virtualization and cloud computing.
Live Migration: Xen supports live migration, which allows running virtual machines to be moved from one physical host to another without disrupting their operation.
Community and Development: The Xen Project has a large and active open-source community that contributes to its development and maintenance. The project undergoes regular updates and improvements to stay up-to-date with new hardware features and security requirements.
Cloud and Data Centers: Xen has been widely used in cloud computing environments, powering many public and private cloud platforms. It allows efficient utilization of hardware resources by running multiple virtual machines on a single physical server.
Overall, the Xen Project has a significant impact on the virtualization landscape, providing a robust and versatile platform for virtualizing computer systems across various industries.
Requirements
- CentOS 6.x/7.x or Ubuntu 16.04 or Ubuntu 18.04 or Ubuntu 20.04 (x86 or x86_64)
- Yum/ apt-get
- Storage to create the VPS (DomUs) disks
Note:
In case of full virtualization, you need a CPU that supports the same
Partition Scheme
On the hardware node, you need to develop the following partitions.
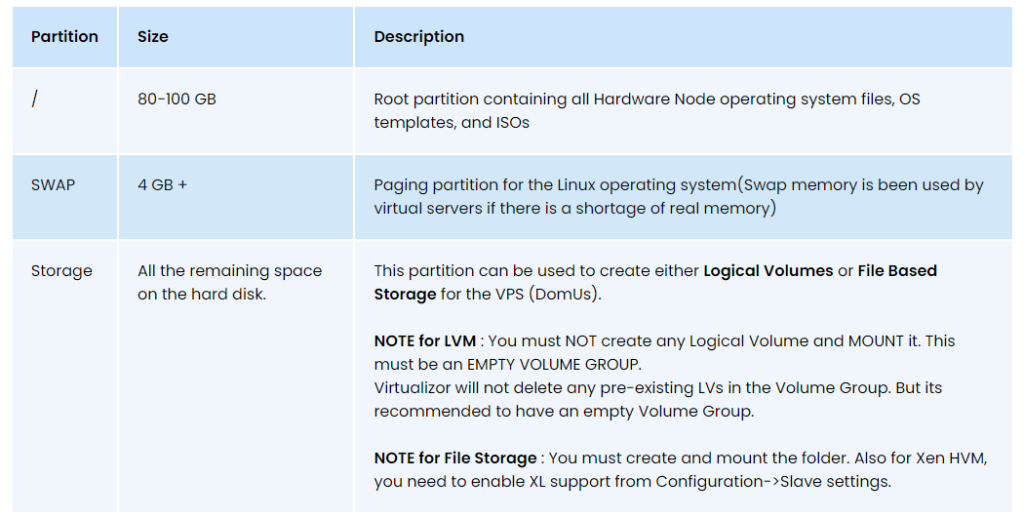
Supported Storage Types
( LVM | File | Thin LVM | ZFS | ZFS Thin | ZFS Compressed | ZFS Thin Compressed | Ceph Block Device )
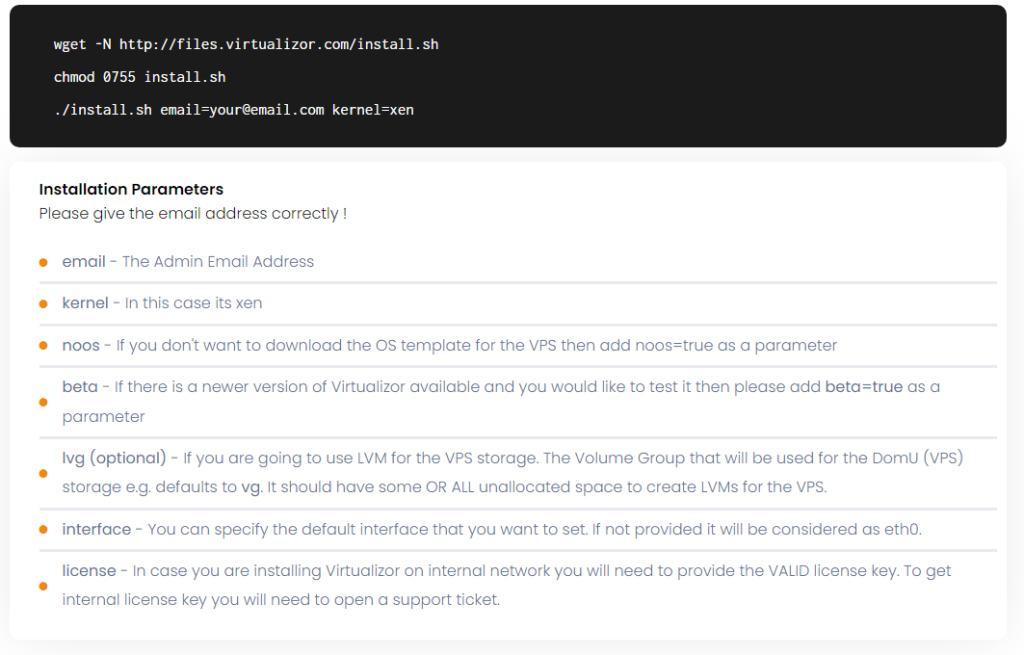
Installation
In a shell terminal (e.g.Putty) and SSH to the server. Access the following commands:
The installation will begin immediately. It may seem that the installation has stopped if your network speed is slow, but please let it continue. You will see something like this :
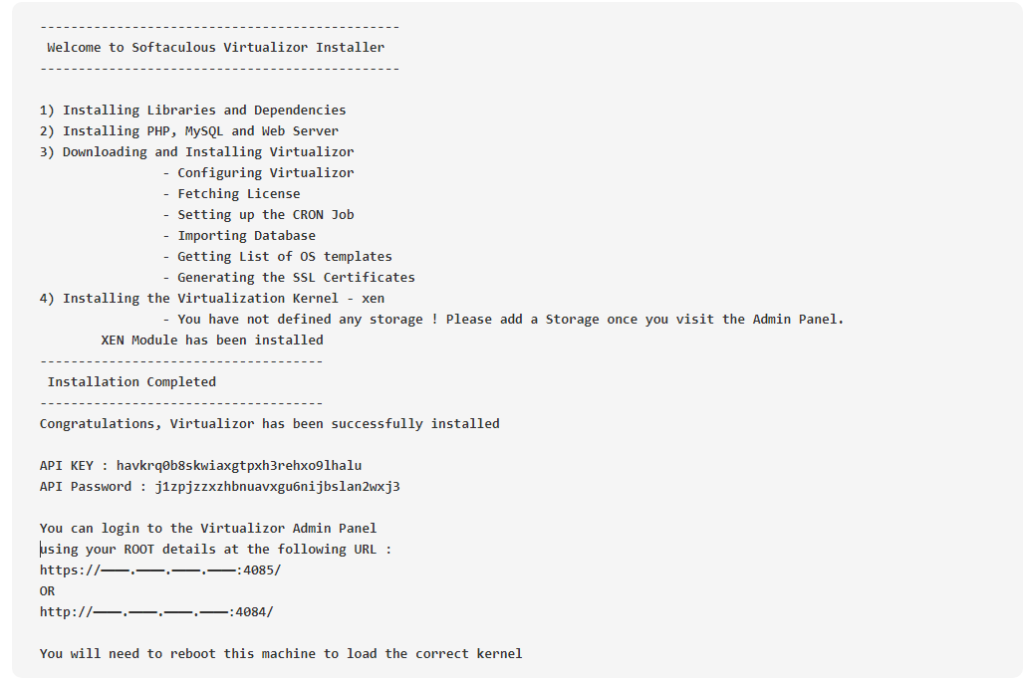
After the installation is completed you will be asked to reboot.

Login
Use these URLs to login to Softaculous Virtualizor Admin Panel,
https://Your-Server-IP:4085/
http://Your-Server-IP:4084/
Log in with the server’s root details.